Introduction to Bash
Course Homepage
April 2019
This project is maintained by UofABioinformaticsHub
Grep and Sed
In this session, we will learn about a few of the most frequently used tools that are very useful for extracting and modifying data.
Command Line Interface (CLI) Text editors (for Small-ish Files)
In general, we rarely work with binary file formats (e.g. MS Office files) in the command line interface (CLI). Instead, we usually work with ASCII (or plain text) files.
We can use a GUI program like gedit (Ubuntu), Text Edit (macOS), or Notepad++ (Windows) to edit these files.
However, there are also several command line programs available that you can use to edit files inside the command line console.
Below is a selection of the most commonly used editors.
There’s no real difference in capabilities, it’s simply a matter of personal preference which you prefer.
Most of you should have nano installed, and we recommend this for today’s sessions.
Once you’ve had a look at nano move to the next section, as the remainder are really just here for your information beyond today.
ed (ee-dee)
- ed: Ed is the standard text editor. Type
qand then press Enter to quit.
Nano
-
Nano: Nano is an easy to use text editor. On most Linux systems, just type
nanoto start the program. To quit, hold Ctrl+X. There are a couple important caveats to remember when using Nano: - Nano will load the entire file into memory, so it may take a while when working with large files.
- Be careful when editing configuration files, as Nano hard-wraps long lines by default. This behaviour can be disabled by
-woption.

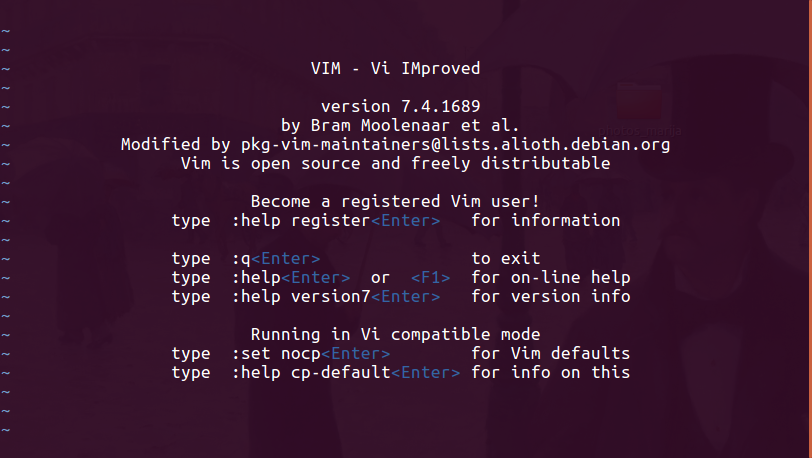
Vi (or Vim/Neovim)
- vi/vim: vi is arguably the most popular text editor among Linux users. It was designed to minimise hand movements, thus allowing very fast typing and editing. However, it has very steep learning curve and are usually not recommended for beginners.
To start vi, just enter
vi. If you are using a recent Linux distribution, you may notice that it is actually running vim. - To quit: type
:q(The colon is required. Typing justqwon’t work.) - Many people prefer
vimas it will use colours in any bash script to highlight variables and commands that it recognises. Vim has a tutorial mode that can be started with:vimtutor.
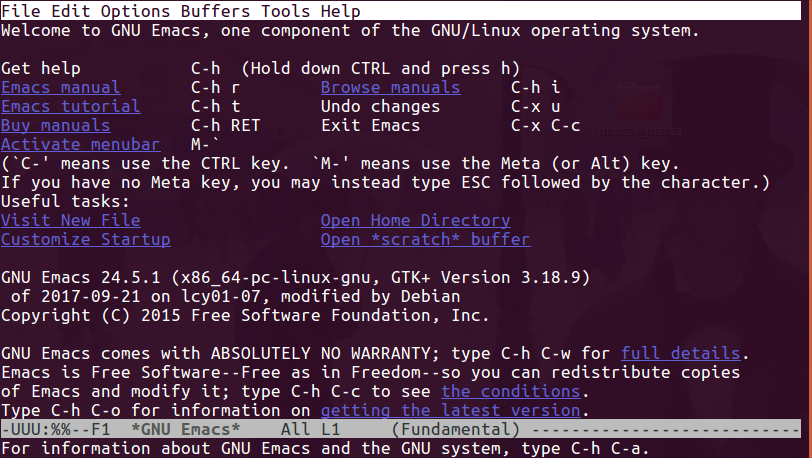
Emacs
- Emacs: Emacs is another popular CLI text editor. There are many flame wars on older Internet sites centred on whether vi or Emacs is better. To start Emacs, just enter
emacs. However, this will probably bring up a windowed mouse-enabled version. To use the pure CLI version, typeemacs -nw. - To quit: type
^x^c(i.e. Ctrl+X Ctrl+C, or in Emacs shorthand:C-x C-c).[2] Emacs also has a tutor mode, although it is not installed by default. It is available here.
For today, we strongly advise just using nano to make sure we’re all seeing similar things. It’s also the most intuitive to use of the three explained above.
Prepare the data files (and some revision exercises)
For this session, we need to prepare some data files for demonstration and we’ll also need to create some directories.
cd ~
mkdir -p Bash_Workshop/files
cd Bash_Workshop/files
Question: What did the -p argument do in the above mkdir command, and was it necessary?
1) Download and uncompress the file GRCh38.chr22.ensembl.biomart.txt.gz into the newly-created files directory, keeping the original as well as the uncompressed version.
You can use the command curl to download this
(Hint: If you have gunzip version >=1.6 you can use the --keep (-k for short) option. Check your version using gunzip --version. If your version of gunzip doesn’t support the -k option, you can use zcat file.txt.gz > file.txt.)
2) Download and extract the file 3_many_files.tar.gz in the files directory.
This should create a sub-directory (3_many_files) containing 100 files, where each file contains a subset of the data in GRCh38.chr22.ensembl.biomart.txt.gz.
(Hint: Refer to the previous sessions for details on how to extract a tar archive. Note that you don’t need to use gunzip first for these files.)
3) Use what you have learnt so far and find out:
(Hint: Try to make your terminal as wide as possible on your screen to enable you to see the column layout the most clearly)
- What is the size of the uncompressed file (
GRCh38.chr22.ensembl.biomart.txt.gz)? (Hint: Uselswith long listing and human readable options selected.) - How many characters, words and lines does it contain? (Hint: What do the numbers in
wcoutput mean?) - How are the data organised in the file? (Hint: Use
head) - What is the column separator?
- How many columns does it contain? (Hint: You’ll have to do it manually, we’ll be learning the actual tool later.)
- Are there column headers, and if so what are they?
- Which column is “Gene name”? How many unique gene names are there in the file? (Hint: Use
cut,sort,uniqandwc)
Answers
1. 95M2. 99,263,344 characters, 11,882,712 words and 198,886 lines.
3.
4. Tabs.
5. 21 columns.
6. Yes, the first row. It contains `Gene stable ID`, `Transcript stable ID` etc. 7. Column 12.
4) Can you answer the above questions without uncompressing the original file?
You should now have some idea of the structure of the data file. The list of column names below will be useful:
1	Gene stable ID
2	Transcript stable ID
3	Chromosome/scaffold name
4	Gene start (bp)
5	Gene end (bp)
6	Strand
7	Karyotype band
8	Transcript start (bp)
9	Transcript end (bp)
10	Transcription start site (TSS)
11	Transcript length (including UTRs and CDS)
12	Gene name
13	Gene type
14	Transcript type
15	Gene % GC content
16	GO term name
17	GO term definition
18	GO domain
19	HGNC symbol
20	Reactome ID
21	Gene description
We will also need the file BDGP6_genes.gtf from previous session, so copy that into the files folder that we’ve just made.
(Hint: Use cp for this)
Working with large files or many files
Text editors (either CLI or GUI) are very convenient when you want to quickly edit a small text file (if you just want to read the file, you can use less or cat), however, they are less useful when the files are very large.
Primer on Linux Command Structure
Before we introduce these tools, you may find it useful to familiarise yourself with the structure (or syntax) of a typical Linux command. However, feel free to continue on if you already understand the topic.
grep
grep[3] gets its name from the ed command g/re/p (Globally search a Regular Expression and Print). It is a utility for searching fixed-strings or regular expressions in plain text files. The basic syntax of a grep command requires two arguments:
grep [PATTERN] [FILE]
which would search for the string PATTERN (either fixed string or regular expression) in the specified FILE. For example, to search for the string DNAJB7 in GRCh38.chr22.ensembl.biomart.txt, we would enter:
grep DNAJB7 GRCh38.chr22.ensembl.biomart.txt
By default, grep prints every line that contains at least one instance of search pattern. (In modern terminal programs, matching strings in each line will be highlighted.)
The easy way to answer the above questions would be to use the -n argument to print line numbers at the beginning of each matched line.
grep -n DNAJB7 GRCh38.chr22.ensembl.biomart.txt
We can easily count lines with this pattern by setting the -c option.
grep -c DNAJB7 GRCh38.chr22.ensembl.biomart.txt
As you can see, this is much easier than in the earlier thought exercises. In addition, you can also search multiple files at the same time, by:
- Providing multiple file names:
grep DNAJB7 3_many_files/datafile1 3_many_files/datafile2
- Or by using file name wild-cards:
grep DNAJB7 3_many_files/datafile2?
grep DNAJB7 3_many_files/*
grep has many useful options. You can find out all of the available options by reading its help page (man grep or grep --help). We will look at examples of some of the more common options.
Example 1 (-w)
If we want to retrieve entries related to DDT gene, we may try a command like:
grep DDT GRCh38.chr22.ensembl.biomart.txt
However, this will also retrieve entries that match DDTL. (You’ll need to look carefully through your results.)
To retrieve entries which are only related to DDT, we can use the -w option which specifies matching to complete words:
grep -w DDT GRCh38.chr22.ensembl.biomart.txt
This will match lines that contain the string “DDT” which are immediately flanked by non-word constituent characters (word constituent characters are alphanumerics and the underscore) and therefore DDTL will no longer match.
Example 2
One of the columns in the file is “GO term name”. If we want to search for entries for which the value in this column is “transport”, we may try something like:
grep -w transport GRCh38.chr22.ensembl.biomart.txt
However, if you examine the output you will see that it also retrieved many lines in which “transport” is simply a word in a longer phrase or sentence, sometimes in the “GO term name” column, and sometimes in other columns.
This is because the -w option will allow for any non-alphanumerical, including spaces and commas, whereas what we really want are instances where entire column value is just “transport”.
In other words, we are looking for the string “[tab]transport[tab]”.
To enter an actual [tab] character, you need to use the key sequence:* Ctrl+V then tab.
Just pressing the [tab] key will not work.
grep "[tab]transport[tab]" GRCh38.chr22.ensembl.biomart.txt
While this works when you are entering commands directly in the command line terminal, it will not work in a script (as you will see in the next session).
The alternative method is to use the usual tab symbol representation (\t), but for this to work, you’ll also need to use the -P option in grep:
grep -P "\ttransport\t" GRCh38.chr22.ensembl.biomart.txt # Single or double quotes.
Alternatively, with recent bash versions, you can use a special quoting with the $'' quotes.
grep $'\ttransport\t' GRCh38.chr22.ensembl.biomart.txt # Note single quotes.
Example 3: case sensitivity
We will use BDGP6_genes.gtf for this example.
As you should know by now, unlike Windows, in Linux almost everything is case sensitive. If we want to search for the entry for a gene “Zen”, we can try:
grep -w Zen BDGP6_genes.gtf
However, this will return zero results. This is because the gene name used is “zen”. So we can perform an case-insensitive search using the option -i:
grep -wi Zen BDGP6_genes.gtf
Example 4: searching for multiple terms at the same time
If we want to extract the entries for genes “Ada” and “Zen”, we can search for them separately, but this can become tedious quickly.
One method to search for multiple terms at the same time is to use extended grep, which is enabled by the option -E:
grep -Ewi "(Ada|Zen)" BDGP6_genes.gtf
Most Linux systems also have an egrep command which is capable of doing the same sort of thing. However, it’s use is not recommended:
egrep -wi "(Ada|Zen)" BDGP6_genes.gtf
While the above may work fine for just a few terms, if we want to search for many terms this can still be rather tedious. We can supply all the terms we want to search for via a file and use the -f option.
For example if we want to search for the genes Ace, Ada, Zen, Alc, Alh, Bdp1, Bft & bwa.
First we need to create a file, and enter the genes of interest one per line. (Do this using nano as some other text editors like notepad, wordpad, word etc will break this.) Take care that there are no trailing spaces after the gene names, and there are no empty lines. Call this file “gene_names”. Then we can perform the search by:
grep -wif gene_names BDGP6_genes.gtf
Example 5: inverse search
We can also use the -v option to perform an inverse search. For example, to extract entries for all protein-coding genes, we can run:
grep -w protein_coding BDGP6_genes.gtf
But if we want to get all other entries, we can instead run:
grep -v protein_coding BDGP6_genes.gtf
Example 6: simple regular expression
One of the most useful feature of grep is the ability to search using regular expressions.
However, we don’t have the time to cover the full scope of the regular expression support provided by grep. But here we will demonstrate a few basic cases.
Wild-cards
Regular expressions allow us to search beyond exact string matches.
The simplest cases are the use of wild-cards. File name wild-cards use ? and * for single and zero-to-multiple character match, respectively.
When using grep, . is the only wild-card symbol. For example:
grep -w a.x BDGP6_genes.gtf
The star symbol * is also used by grep, but it means to match any number of the previous character, by itself it does not match anything. So:
grep * BDGP6_genes.gtfwill return nothinggrep an*x BDGP6_genes.gtfwill match any string that starts witha, ends withx, and has 0 or multiplens in between.
Range search
grep provides a more restrictive pattern matching through the use of square brackets: []. Any letters inside the square brackets is allowed. For example:
a[bc]dwill matchabdandacda[a-z]ewill match everything fromaae,abe, … toaze, the dash means a range.a[0-5]ewill matcha0e,a1e,a2e,a3e,a4eanda5e, so range works for numerics too.
The following command is looking for entries with any lines matching ada, adc, ala and alc:
grep -wi A[dl][ac] BDGP6_genes.gtf
Unfortunately, it is also matching entries that contain gene names like "tRNA:Ala-AGC".
There are ways of finding results in specific columns, and these approaches become easier with experience.
Here, we’ll use the \ to “escape” a quotation, which stops it having it’s “special meaning” and returns it to just being an ASCII character.
The search pattern will need to be enclosed in double quote marks here for this to work too.
grep -wi "\"A[dl][ac]\"" BDGP6_genes.gtf
Exclusion
We can also use the caret symbol (^) to exclude specific characters.
For example A[^dl][ac] will match any 3-letter term that begins with A,
ends with a or c, but doesn’t have d or l in the middle. So this command:
grep -wi "\"A[^dl][ac]\"" BDGP6_genes.gtf
should show lines containing Ama, Apc, ara, ACC and ana.
Anchoring
Suppose we want to extract all entries from chromosome 3R from the file BDGP6_genes.gtf.
If we simply run this command:
grep 3R BDGP6_genes.gtf
there is no guarantee that the string “3R” does not appear somewhere else in the line and not at the beginning. In fact, one of the lines return is matching to the gene name “Rpn13R”. Using the option -w may help a bit, but what we really want is that the string “3R” appears at the start of the line.
To do this, we use the caret symbol (^), again.
grep ^3R BDGP6_genes.gtf
The caret symbol tells grep to look for “3R” only at the beginning of the line.
Similarly we use dollar sign ($) to look for strings anchor at the end of the line.
NB: This can initially appear to be confusing as the ^ has two functions. To be clear about this:
- Inside square brackets,
^behaves as the word ‘NOT’ - Outside square brackets, it is used to indicate the start of a line.
Exercises
1) Create a list of gene names from BDGP6_genes.gtf:
cut -f 2 -d ";" BDGP6_genes.gtf | cut -f 2 -d\" | grep -v "^#" | sort | uniq > fly_genes
Can you explain what the command above is doing? A good way of testing a complex command line is to simply break it down and examine the output from successive addition of each command from the pipeline:
cut -f 2 -d ";" BDGP6_genes.gtf
cut -f 2 -d ";" BDGP6_genes.gtf | cut -f 2 -d\"
cut -f 2 -d ";" BDGP6_genes.gtf | cut -f 2 -d\" | grep -v "^#"
cut -f 2 -d ";" BDGP6_genes.gtf | cut -f 2 -d\" | grep -v "^#" | sort | uniq > fly_genes
2) Extract from the fly_genes file the gene names which:
- start with “z”
- start with “a” and ends with a numeral
- contain non-alphanumerics
- contain a dot
.
Answers
1. `grep ^z fly_genes`2. `grep ^a.*[0-9]$ fly_genes` or `grep ^a fly_genes | grep [0-9]$`
3. `grep [^a-z0-9] fly_genes`
4. `grep "\." fly_genes `
3) Look up the help page to see which option can provide the line number of search output.
More grep functions
If you look into the help page for grep, you will see that grep has 4 different modes of pattern matching:
-G/--basic-regexpis the default basic mode;-E/--extended-regexpis the extended mode we have used earlier;-P/--perl-regexpsupports the Perl-style regular expression, while;-F/--fixed-stringsonly performs exact matches.[4]
Using the extended or Perl modes, you can perform even more complex and flexible searches. However, if you are only searching for fixed strings, use the -F option as it is much faster, especially when searching for lots of patterns specified in a file using -f.
Unfortunately we don’t have time to cover it all in this session, but if you wish to learn more about it, you should look up grep tutorials online.
sed
While grep is excellent at searching, it essentially only performs queries and does not allow us to edit the output.
For that we need different tools.
Like most command line utilities, sed is designed to process input data (file or stream) line by line.
From the GNU sed documentation (https://www.gnu.org/software/sed/manual/sed.html):
sed is a stream editor. A stream editor is used to perform basic text transformations on an input stream (a file or input from a pipeline). While in some ways similar to an editor which permits scripted edits (such as ed), sed works by making only one pass over the input(s), and is consequently more efficient. But it is sed’s ability to filter text in a pipeline which particularly distinguishes it from other types of editors.
It is important to remember that sed is a very complex tool that has been in use and constantly evolving for decades, and as for licensing reasons it has diverged on different platforms.
Therefore sed on macOS may not work exactly the same as on Linux, this is the classic BSD vs GNU issue which we’ve already come across.
For this workshop, we typically focus on GNU tools (Linux).
If you are on macOS and find that some things don’t quite work, please ask (or perform a Google search).
sed is a very complex tool, and it is impossible to cover all its functions in this session.
Here we will only show you the most common usage 1) printing select lines from a file, and 2) search-and-replace.
Basic Printing with sed
A basic sed command has the form: sed SCRIPT INPUTFILE where the script contains instructions on how to process the input.
At it’s simplest, we can simply print a few rows very much like head.
In the following command, we’ll print the first 10 lines of the file.
sed -n '1,10p' BDGP6_genes.gtf
Unless told otherwise, sed will stream the entire file to stdout so by setting the -n flag we’re turning this function off, and by including '1,10p' we’re then telling sed to print (p) lines 1 to 10.
Unlike head or tail which only print the beginning or end of the file, sed can print lines from anywhere in the file.
sed -n '5,9p' BDGP6_genes.gtf
sed can also print a recurring pattern of lines. In the following, we’ll print every 2nd line, starting at the 1st line.
This will just dump everything into the terminal, so if you want to look more carefully, pipe the output into head or less.
sed -n '1~2p' BDGP6_genes.gtf
Editing Text ‘On The Fly’
First, let’s prepare a smaller file so that it’s easier to see how sed functions.
Extract from BDGP6_genes.gtf all entries that contain “Ac3”, “ADD1”, and “Acn”
into a file, “small.gtf”.
egrep "(Ac3|ADD1|Acn)" BDGP6_genes.gtf > small.gtf
Let us consider a basic search-and-replace command where we’ll replace all entries of Ac3 with AC-3 while we’re streaming to stdout.
(NB: We’re not changing the file on disk.)
We’ll break this down gradually over the next few lines.
sed 's/Ac3/AC-3/' small.gtf
sed can be called to directly act on a file or to process input from stdout/stdin.
So the following command is essentially the same:
cat small.gtf | sed 's/Ac3/AC-3/'
If you run the command, you should see that:
- by default the entire content of the file is printed to
stdout - the string “Ac3” has been replaced by “AC-3”
Let us now examine the second term, 's/Ac3/AC-3/' (also, the s command, or the “script”):
- The enclosing quotation marks are helpful.
- The slashes are separators that divide the expression into 4 parts.
- the first part is
s, which tellssedthat it is to perform substitution. - the second part is the search pattern,
- the third part is the term to replace with,
- the fourth part is empty at the moment.
- the first part is
You can actually use any character for the separator.
This is useful if you have slash characters in your search pattern or replacement string as can happen if you are changing file paths.
In this case, any symbol or character after the first s is recognised as the separator character. You can choose whichever feels most comfortable to use.
You should choose characters that stand out from the rest of the line.
Conventionally, people use !, |, #, _, etc. For example:
sed 's Ac3 AC-3 ' small.gtfuses space “ “ as separatorsed 's#Ac3#AC-3#' small.gtfuses#character.
Make sure you are being clear; using a 1 for the separator would be valid, but not helpful.
s command modifiers
The fourth and last part of the s command contain zero or more modifiers that alter the default behaviour.
A frequently used flag is “g”, which means global replacement. By default, the s command will only perform substitution for the first matching instance:
sed 's/gene/GENE/' small.gtfwill only alter the first instance of “gene” in each line, where assed 's/gene/GENE/g' small.gtfwill alter all instances.
Rather than using “g”, we can also use a number to specify exactly which instance to alter:
sed 's/gene/GENE/2' small.gtf
will alter the second instance only.
Another frequently used flag is “I” or “i”, which allows for case-insensitive matching on the search pattern.
$ sed 's/fly/FLY/ig' small.gtf will alter any and all upper/lower-case combinations of “fly” to “FLY”.
Regular expressions
The search term in sed supports regular expression in very similar ways to grep.
As exercises, can you explain what each of these sed commands are doing?
1) sed 's/ac[n3]/ACX/Ig' small.gtf
2) sed 's/^/chr/' small.gtf
3) sed 's/;$//' small.gtf
Answers
1. Change all instances of acn/ac3 (case-insensitive) to ACX 2. Append "chr" to the start of every line 3. Strips off ";" at the end of the lineFormatting replacement strings
Sometimes, we want to alter a string by adding to it without modifying the search term itself. For example, if we want to add a star symbol next to gene names Acn and Ac3, without altering gene names. We can perform this one by one:
sed 's/Acn/Acn*/' small.gtf | sed 's/Ac3/Ac3*/'
or we can use regular expression search and “&”:
sed 's/Ac[n3]/&*/' small.gtf
where “&” simply means the string that matches the search pattern.
Can you explain what the following command does?
sed 's/fly/&OrWorm/gi' small.gtf
Redirecting output
Like most stream editors, sed does not alter the original file, and instead writes the output to stdout.
Therefore to save the changes, we can simply redirect to a file:
sed 's/Ac[n3]/&*/' small.gtf > small_starred.gtf
As is almost the case, you should never redirect the file back to itself, expecting it to have made the changes in place. You will simply end up with an empty file!
sed 's/Ac[n3]/&*/' small.gtf > small.gtf
THIS WILL FAIL (data loss!).
Check the contents using cat, head or sed and you’ll see the file is now empty.
First we’ll recreate the file
egrep "(Ac3|ADD1|Acn)" BDGP6_genes.gtf > small.gtf
sed actually has an option that will allow you to make edits in-place: -i/--in-place[5].
Now we’ll try the correct approach where we edit the file using this strategy.
sed -i 's/Ac[n3]/&*/' small.gtf
THIS WILL WORK on Ubuntu and git bash.
Note: On macOS -i (i.e. BSD sed) doesn’t work without an argument provided. In GNU sed, -i can be used with or without an argument.
Exercise: Batch-rename files
In the directory 3_many_files, there are a number of files with only a single digit (e.g. datafile1), this makes it harder to sort the files in numerical order. So ideally we want to rename the files with single digit to double digit:
mv datafile1 datafile01
It’s a bit tedious to do this one by one, can you write a command line that can do this all in one go?
Answer
This command line will generate all the required "mv" commands:ls datafile? | sed 's/[0-9]/& datafile0&/' | sed 's/^/mv /'We can then add "| sh " to the end to execute it all:
ls datafile? | sed 's/[0-9]/& datafile0&/' | sed 's/^/mv /' | sh
awk
awk is a tool frequently used for querying and extracting information from tabulated data files, and also has the ability to write formatted output. In fact, awk is a programming language[6], which means that it has some functions/features that are not provided by grep or sed. But it also means that we don’t have the time to cover it in this session.
Some of the most important (or most commonly used) features of awk are:
- typically used with tabulated data files (.csv or .tsv)
- can perform numerical comparison
- can format output more easily than
sed
If you are interested in learning how to use awk, there is an extensive tutorial available here. This will take some time to work through.
Footnotes
[1] Emacs is not installed by default on Ubuntu (16.04). To install, type sudo apt install emacs on Ubuntu or apt-based Linux systems.
[2] The Control Ctrl key is usually denoted as ^, however, sometimes (e.g. in Emacs) it is denoted as C-.
[3] grep is short for g/re/p (Global search for Regular Expression and Print), a command in the original UNIX text editor ed (precursor to vi/vim).
[4] If you are wondering why there is a mode which doesn’t do any regular expression, this is because by turning off all regular expression matches, exact string search can be much faster. The datasets we have for this workshop are not large enough to see any differences, so we can’t quite demonstrate this. But you can test it yourself on any large plain-text files that you can find.
If you want to perform any benchmarking, you may find the command time to be useful. Just add it to the beginning of any command line, e.g.: $ time grep -v protein_coding BDGP6_genes.gtf
[5] Technically, sed -i isn’t making the changes in-place. It’s writing the output to a temporary file, then renaming the temporary file to the original file name.
[6] The GNU awk language manual: https://www.gnu.org/software/gawk/manual/gawk.html